
Set Up a GitHub Repository | Connect GitHub & Zenodo | Send a snapshot of code to Zenodo | Add important details to Zenodo | Add to the UIowa Community | Get a badge!
Publishing your code offers many benefits. In addition to preserving your code and making it accessible to others, publishing also ensures others can cite it, reproduce it, and helps you contribute to the open science movement.
Having your code in GitHub is not enough for long-term reproducibility for your code. By using Zenodo, which is a repository, the code remains publicly available, even if GitHub goes away.
This page outlines the steps for connecting Github (for code development) with Zenodo (for preserving and sharing code), so you can take advantage of both systems:
- Zenodo preserves snapshots of the code and creates a citable DOI for your software, with information that enables others to find and cite it, and
- When you create new versions in GitHub, you can quickly publish them in Zenodo.
Below is a summary of the steps for connecting GitHub with Zenodo, and publishing snapshots of code in Zenodo. Click on images to expand them.
A. Create a GitHub repository, if you don’t already have one
These steps prepare the GitHub repository for the snapshot that will go into Zenodo. If you already have a GitHub repository to share, open it, make sure it is set to public, then go to Step B: Connect your GitHub and Zenodo accounts.
1. Log in to GitHub.
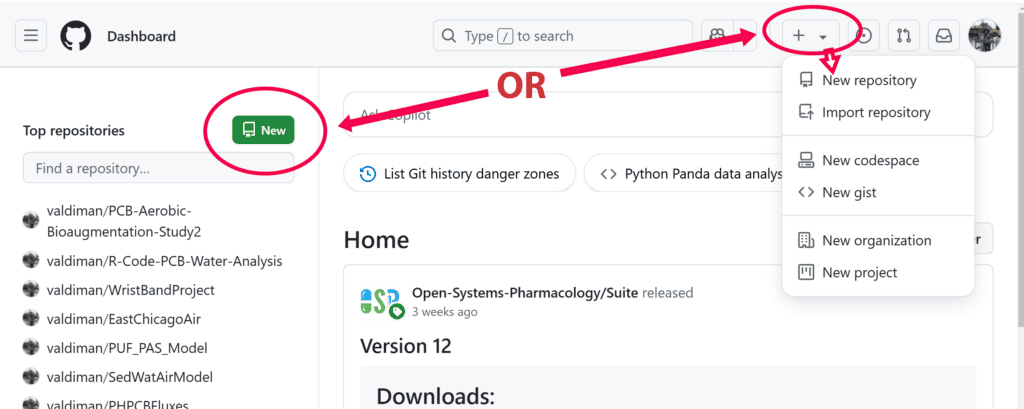
2. Create a new repository:
Click the green “New” repository button in the repositories section (top of the page, left side),
OR
Click the plus sign (+) on the upper right side of the page, and click on “New Repository.”
NOTE: If you have never created a GitHub repository before, the Top repositories section will have a green “Create repository” button instead.
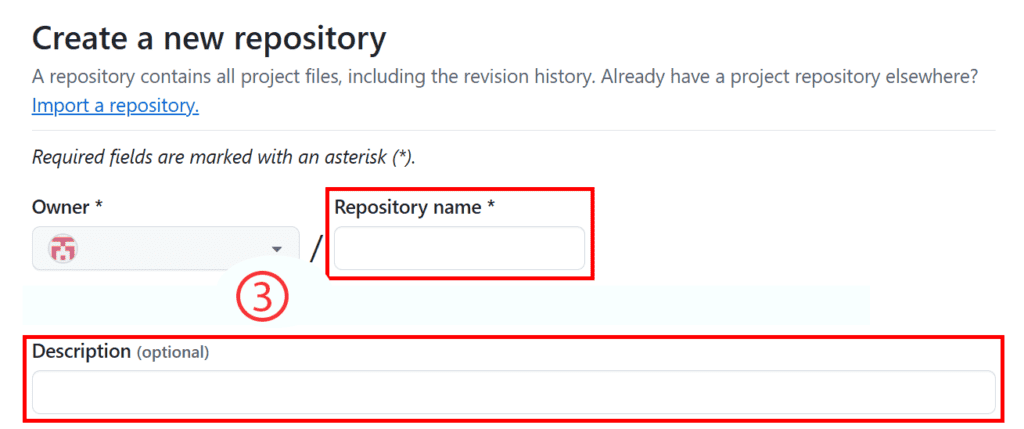
3. Provide some details about your code. These will be pulled into the Zenodo system later:
-
- Choose a descriptive Repository name (you can modify this later in Zenodo).
- Write a brief Description of what the code does. A longer description can be provided in the Readme, (#5 below).
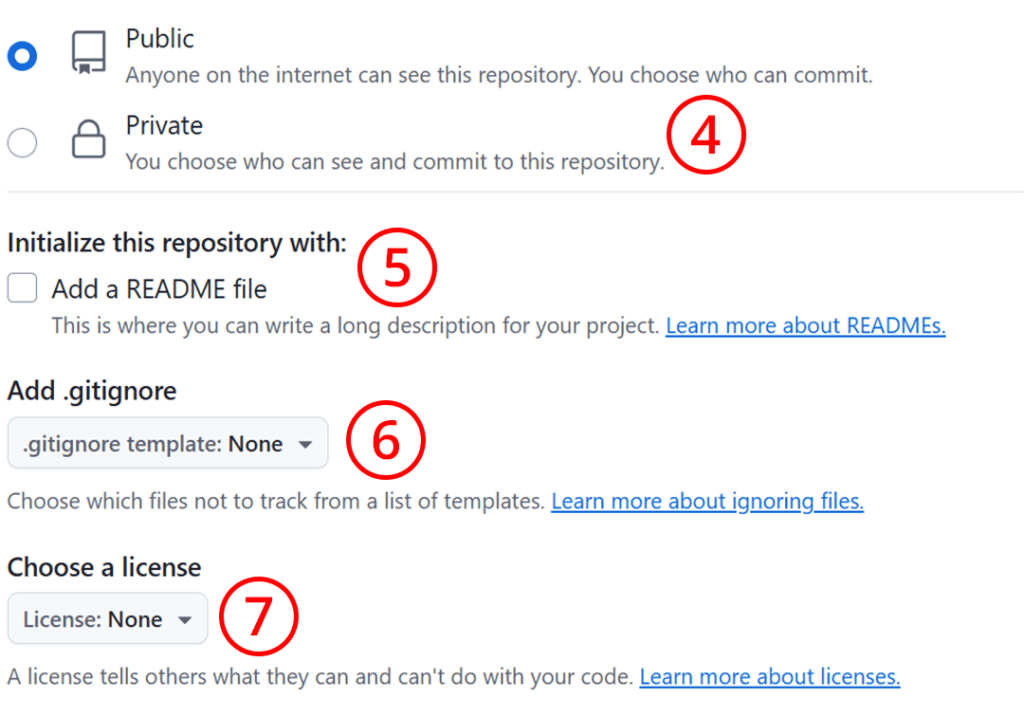
4. Make the GitHub repository public (screenshot below).
-
- This is required in order to send a copy of the code to Zenodo.
5. Add a README file about the code now, or add it later (just make sure you include one!)
-
- Readme files help others find and understand your code. Use text (.txt) or markdown (.md) format for documenting code.
- See code documentation guidelines.
6. Optional: choose which files not to track (if applicable) – more about .gitignore here.
7. Choose a license for sharing your code (see common software licenses).
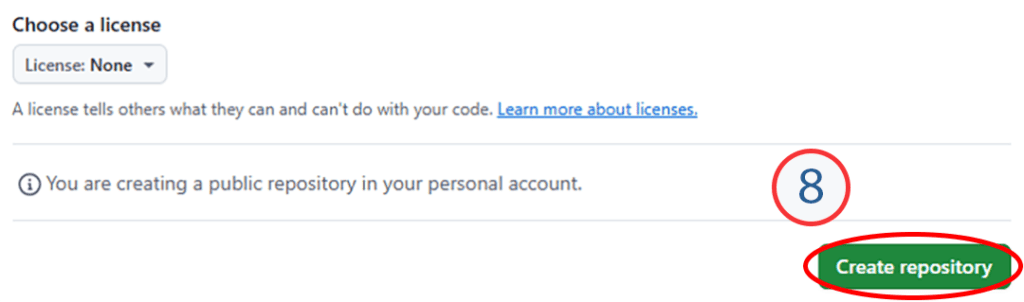
8. When you’re done, click the green “Create repository” button at the bottom of the page. Now you’ve created a GitHub repository.
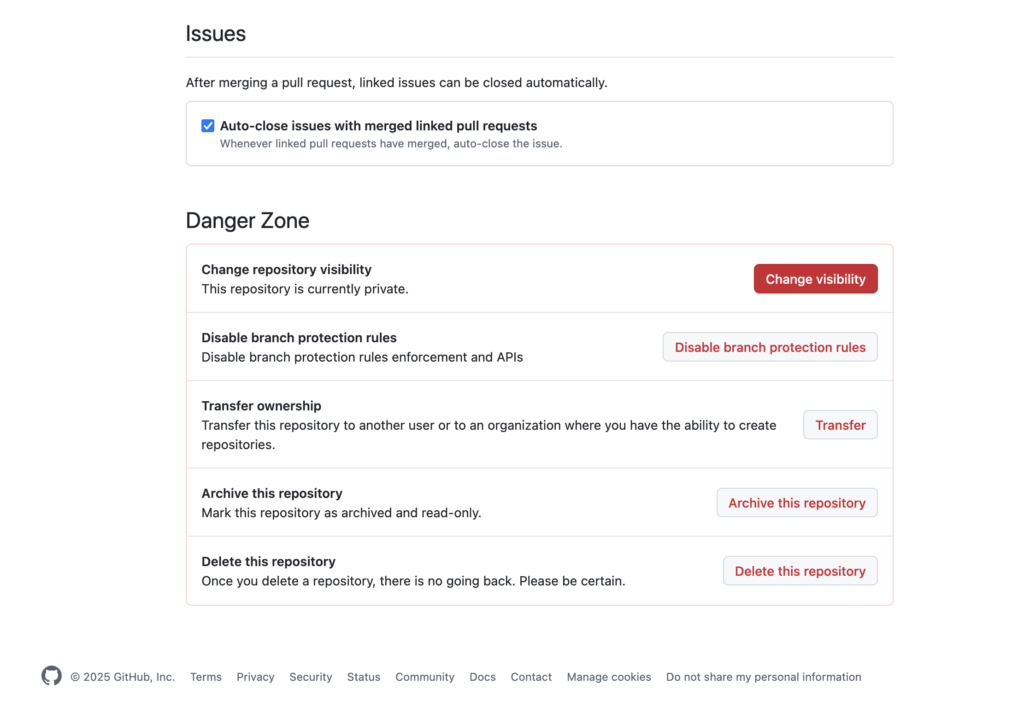
9. If you later need to change the visibility of the GitHub repository, go to settings and scroll down to DANGER ZONE, where you can change that and several other settings. This will not affect the code published in Zenodo (which is covered in the next section below).
B. Connect your GitHub and Zenodo accounts
1. Don’t have a Zenodo account ? You can set one up via your GitHub or ORCID accounts, or you can choose to link them after account creation.
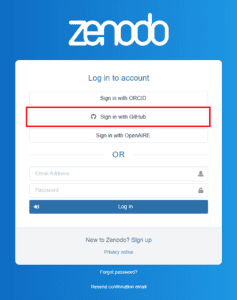
NOTE: Zenodo may prompt you to authorize GitHub:

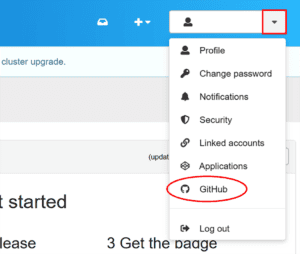
2. If you need to link an existing Zenodo account with GitHub: log-in to Zenodo and go to Settings > Linked Accounts
-
- We also recommend linking your Zenodo and ORCID accounts, so your code published in Zenodo will automatically appear in your ORCID profile.
C. Send a snapshot of your GitHub repository to Zenodo
1. In Zenodo: now that Zenodo and GitHub are linked, you can see a list of your GitHub repositories by navigating to the GitHub button in the drop-down menu in the top-right hand corner.
-
- If needed, choose “Sync Now” to update the list.
Your list might look something like this:
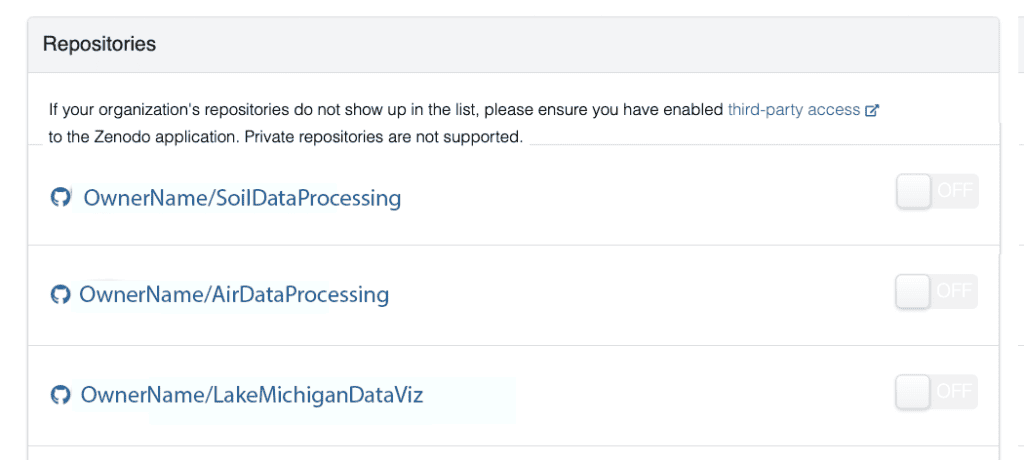
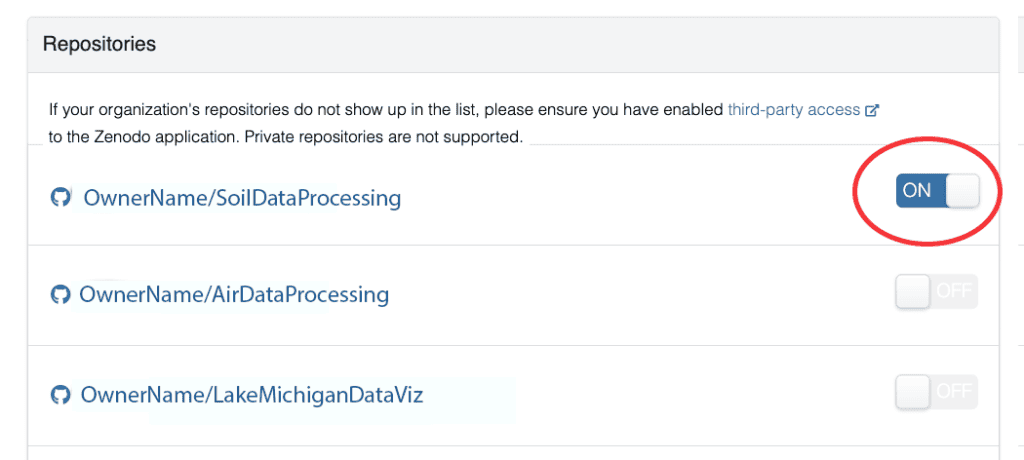
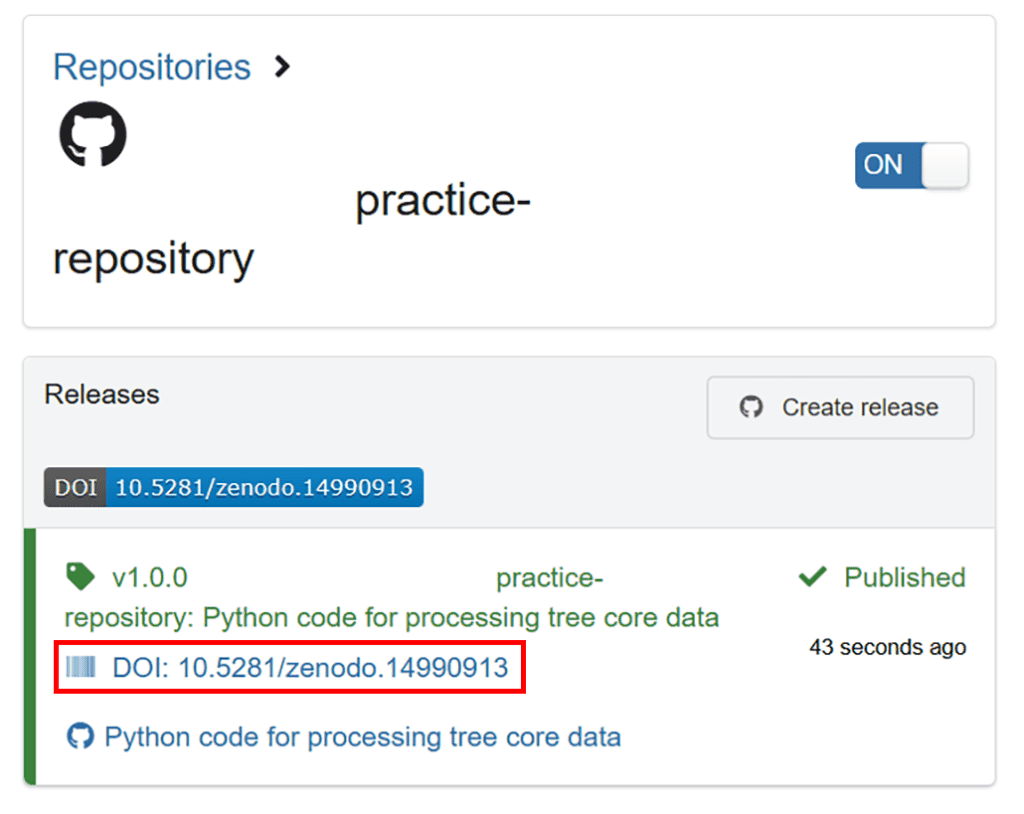
2. Select the GitHub repository that you want preserve and share in Zenodo, and toggle the “on” button next to it.
NOTE: If the GitHub repository is not displayed in the list after syncing, make sure it is set to public visibility in the GitHub repository settings (A.4 above).
3. Now click on the name of that repository to open it.

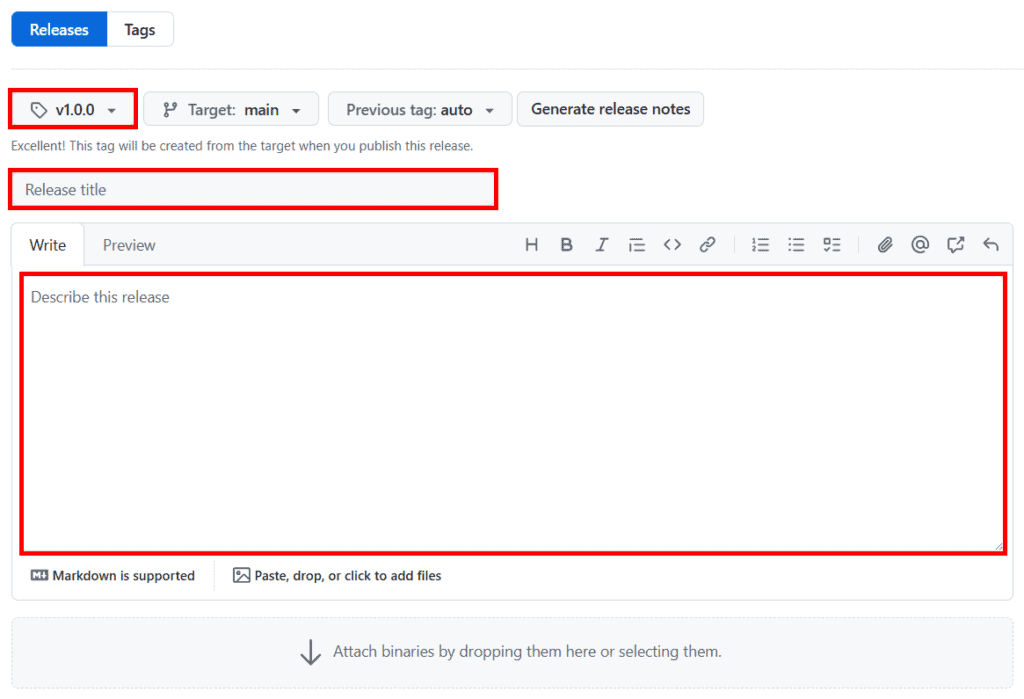
4. Now you’ll be in GitHub, to fill in the following details:
Tag (version): The “tag” field is the version number. (If this is your first release (e.g., version 1.o.o), the entry for the “tag” would be “v1.0.0”).
Release title: Provide a title for this release.
Describe this release: For instance, if this is a revision of a previous release, describe the changes that have been made.
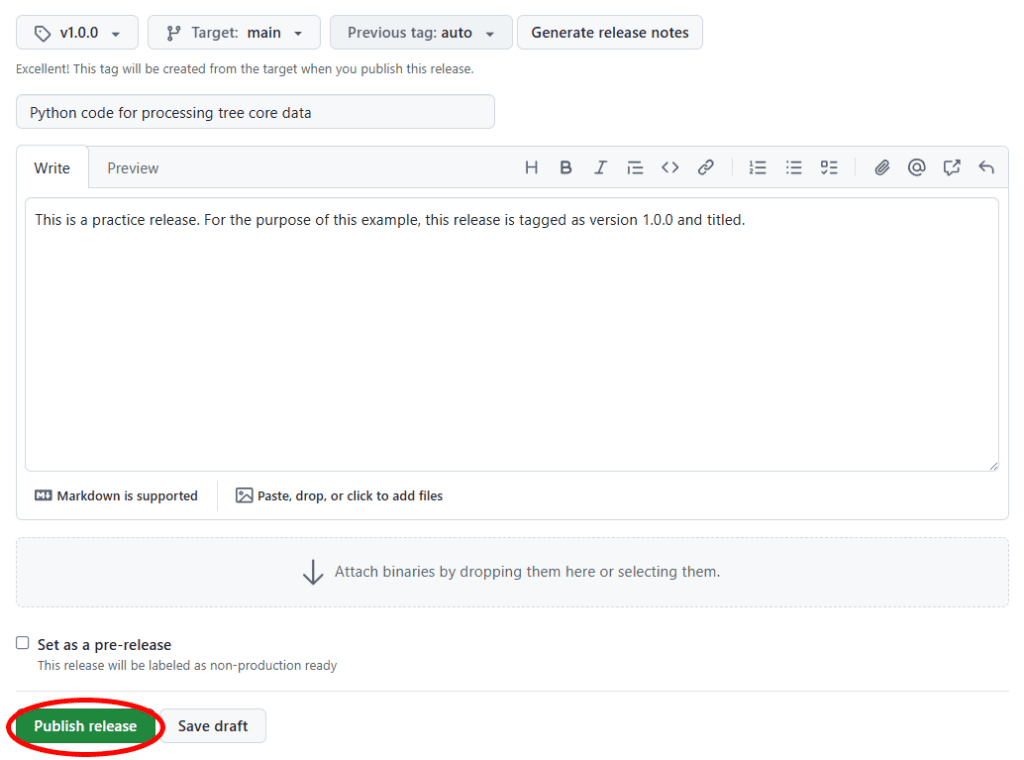
5. Click the “Publish Release” button at the bottom left hand side of the page.
D. Add details to the Zenodo record
These details make your code easier to find, and connect it to data, publications and grants.
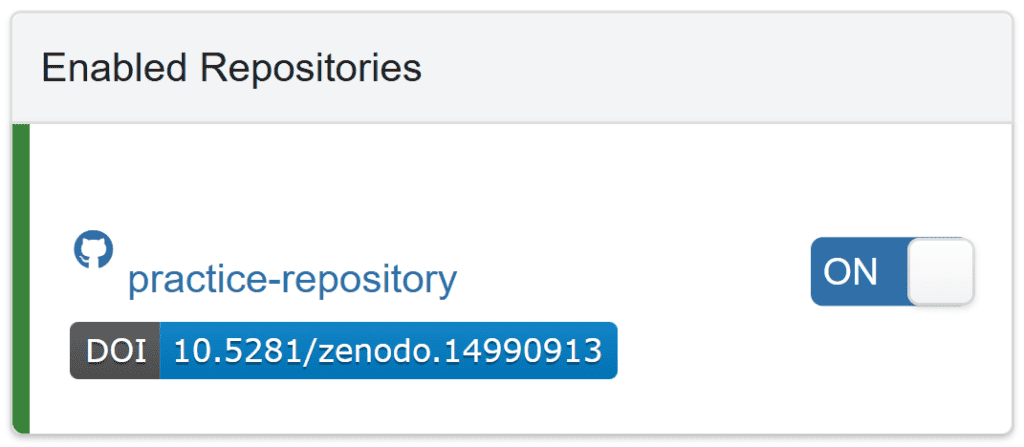
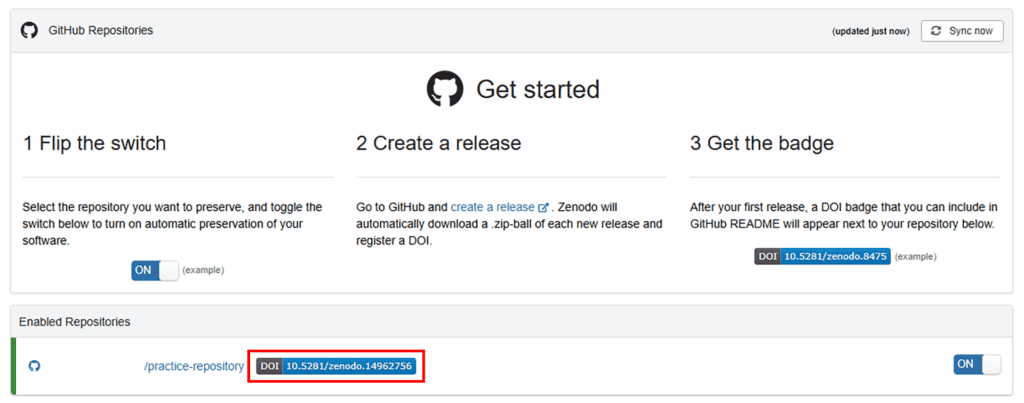
1. Return to Zenodo and access GitHub through Zenodo, you should see your repository listed under “Enabled Repositories” with a blue DOI button next to it. (If it’s not there, choose “Sync Now”).
In Zenodo, you can now:
1. Use Zenodo to edit the archive and/or publish a new version.
2. Add a description of the code and other details that will help others find, understand, and use your code.
For tips and best practices, see Documenting Your Code.
E. Add your Zenodo code deposit to the University of Iowa Community in Zenodo
This will allow other UI researchers to easily find your code (and for you to find theirs!)
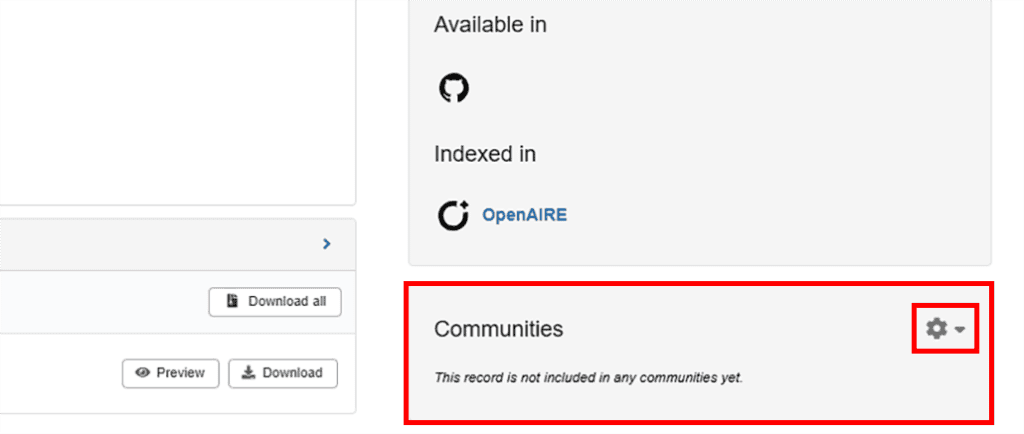
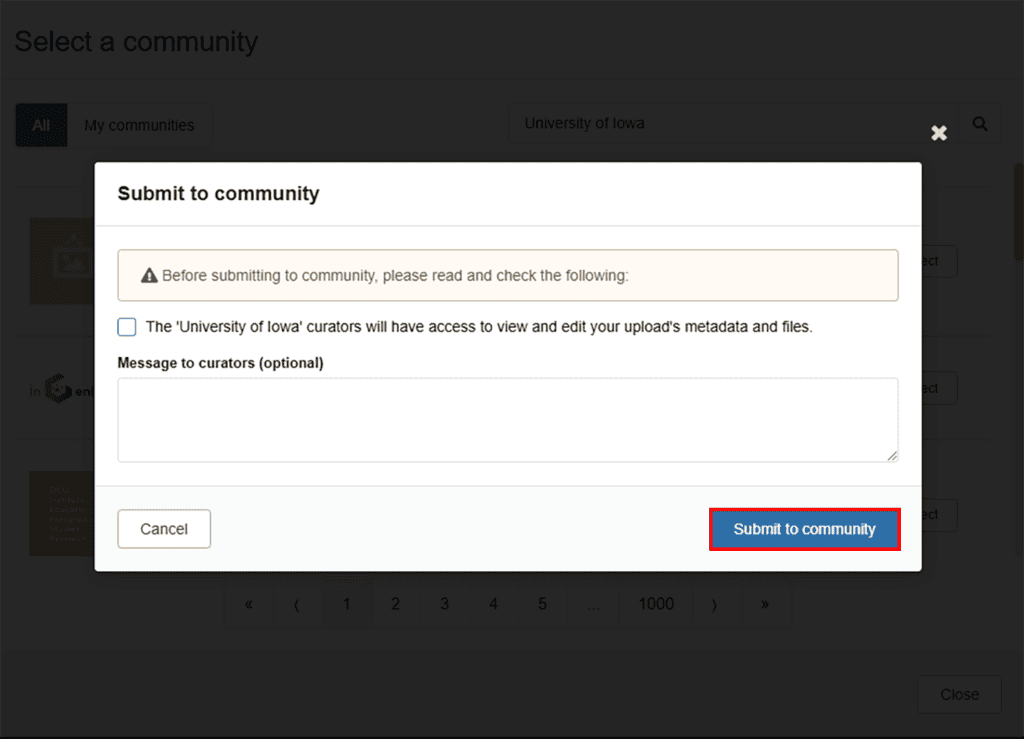
1. In Zenodo, from your list of records, click the DOI link for the record you want to associate with the University of Iowa.
2. Find the “Communities” section on the right hand side of your screen and click the cog icon.
NOTE: You may need to scroll down to find it.
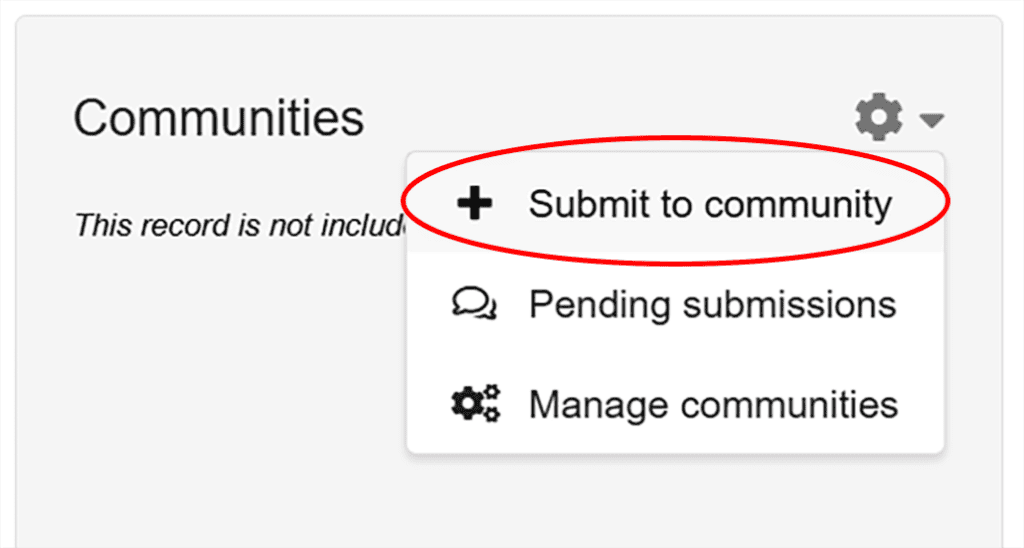
3. Select “Submit to community” from the drop down menu.
4. Search for and choose the University of Iowa community.
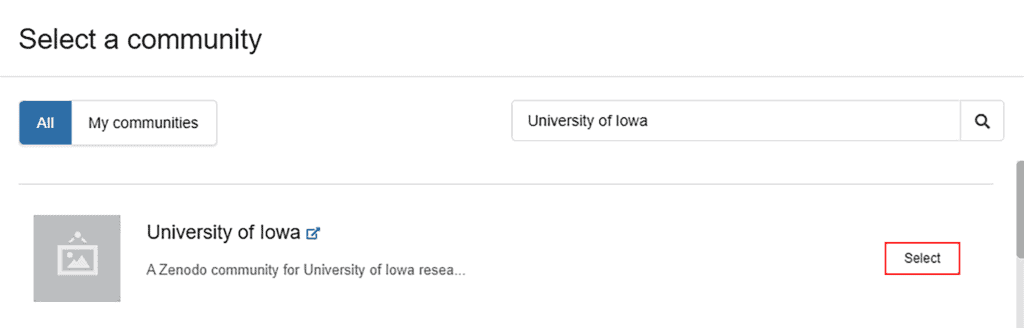
5. Confirm the information, then submit it to the community.
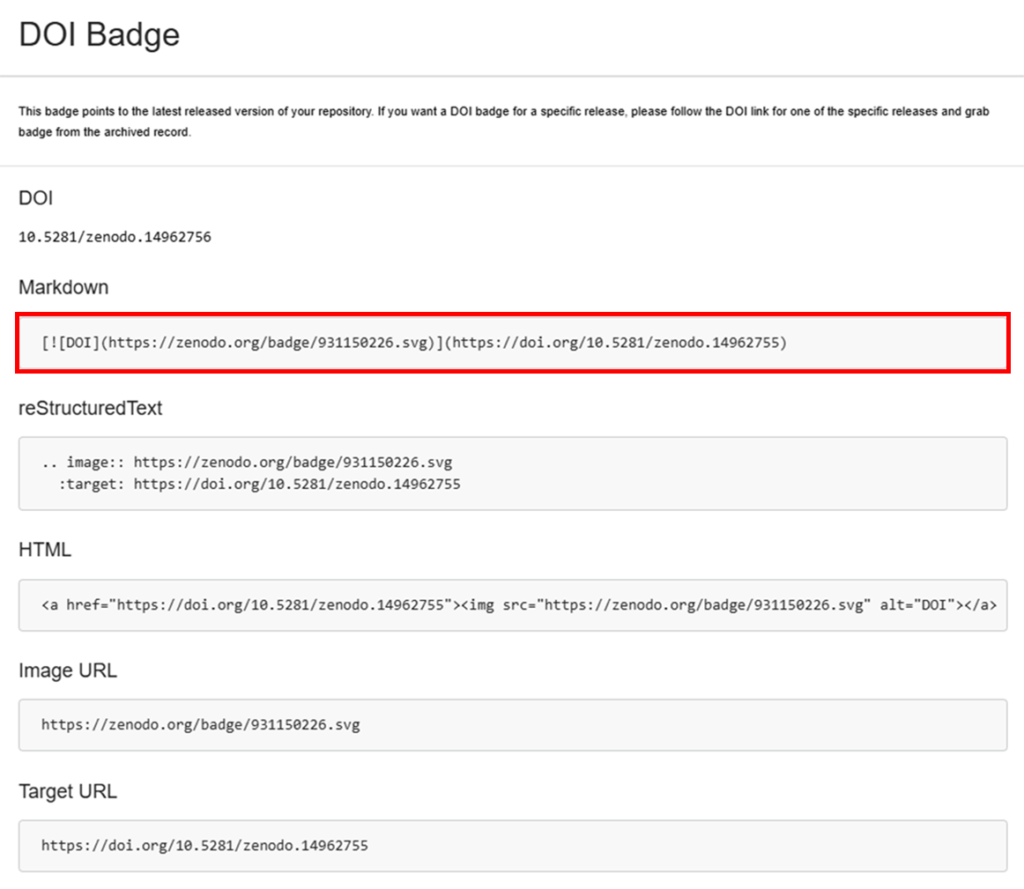
E. Get a badge!
Create a badge to add to your GitHub page, which links to the published code in Zenodo.
1. Click the blue DOI button to copy the badge in Markdown and add it to your README in GitHub.
What does sharing code via Zenodo do for you?
Zenodo is an open repository that
- preserves your code,
- provides access to it, and
- makes it easier for others to find it (if you provide a readme and other information).
By connecting your Zenodo and GitHub accounts, it’s much easier to preserve and share each new version/release of GitHub code in Zenodo.
- Each submission in Zenodo will be assigned a unique DOI (digital object identifier), so your code can be cited by others.
Archiving in Zenodo requires two steps:
- Linking your GitHub repository with Zenodo, and then
- Creating and publishing a release of your GitHub repository in Zenodo.